Notes and Attachments
is a common feature across all menus in LinkWEB. It allows users to maintain
capture important information and add supporting documents or files. Notes and
Attachments contains:
Steps to add details:
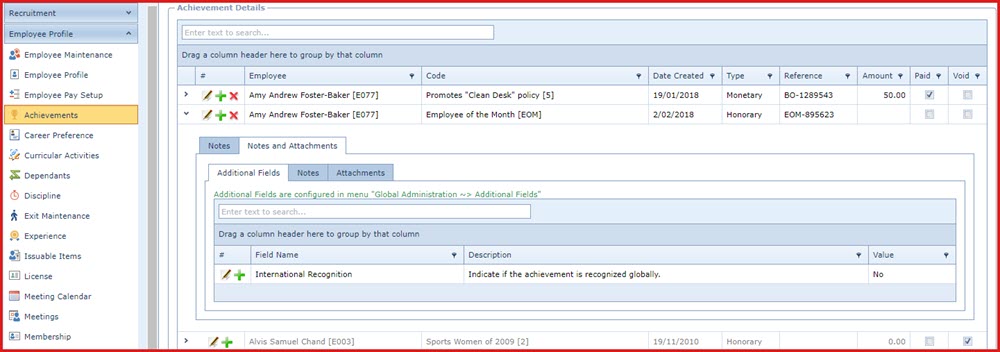
Figure 1: Additional
Fields Figure 2:Notes Figure 3:
Attachments and
Hyper links
Additional Fields - Additional fields allows users to
add new fields to a menu that can be
used
to store additional information.
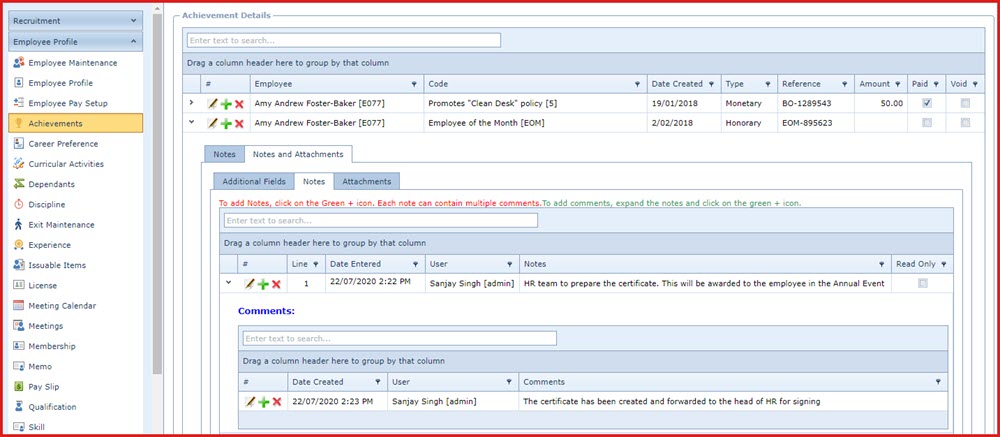
Notes and Comments - Notes is used to add details
which
can
be "Read Only".
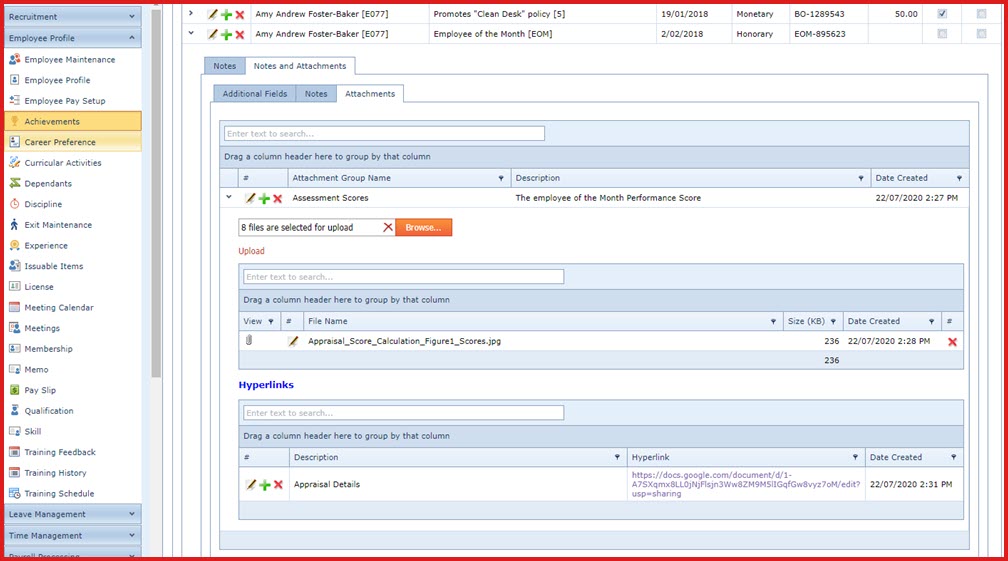
Attachments and Hyper Links - Attachments are used
to store and share files or images. Users can upload multiple files under
different attachment groups.
Tasks
Click on "New". This will open the edit form.
Enter below details:
Field Name - This is the name that will appear
in the menu.
Field Type - Select the field type which
defines the input type for the field.
Description - Enter the detailed description
of the additional field. This tells the users what information must be
updated.
Save Notes
- This is used to add notes
and comments for a record. Refer to Figure 2.
Enable access for menus "FR080 - Notes Security
Access" and "FR083 - Comments Security Access".
Click on "New". This will open the edit form.
Enter below details:
Notes - Enter the full details
Read Only - Tick the option to disallow users
to edit the notes.
Save.
Expand into the details to add comments for
the notes. Attachments and Hyper
links- This allows users to attach
documents and referential URLs for a record. Refer to Figure 3.
Attachments
Click on "New". This will open the edit form.
Enter the "Attachment Group Name",
"Description" and Save. This will create the attachment header.
Click on the "Browse" button and select
files to attach.
The "Upload" option is activated after a
file has been selected. Once the files have been attached:
Click on "View" to review the contents of
the attachments.
Click on "Red X" to delete attachments.
Hyper links
Click on "New". This will open the edit form
Field
Description
Summary
Summary of the task
Details
Enter detailed information about the
task
Priority
Refer to Dropdown: Task Priority
Due Date
Due date of task
Task Group
Refer to Dropdown: Task Group
Assigned To
Assigned to a user
Status
Refer to dropdown: Task Status
Create a Helpdesk case using this
template
Use this option to create a helpdesk
case for this task
Click on "New". This will open the edit form.
Enter below details:
Rule Name - This is the name that will appear
in the menu.
Field Type - Select the field type which
defines the input type for the rule.
Description - Enter the detailed description
of the additional rule. This tells the users what information must be
updated.
Save